Showing posts with label DSDN104_p2_Hand-in. Show all posts

Wednesday, 19 September 2012

Project Two: Final Render And Photos


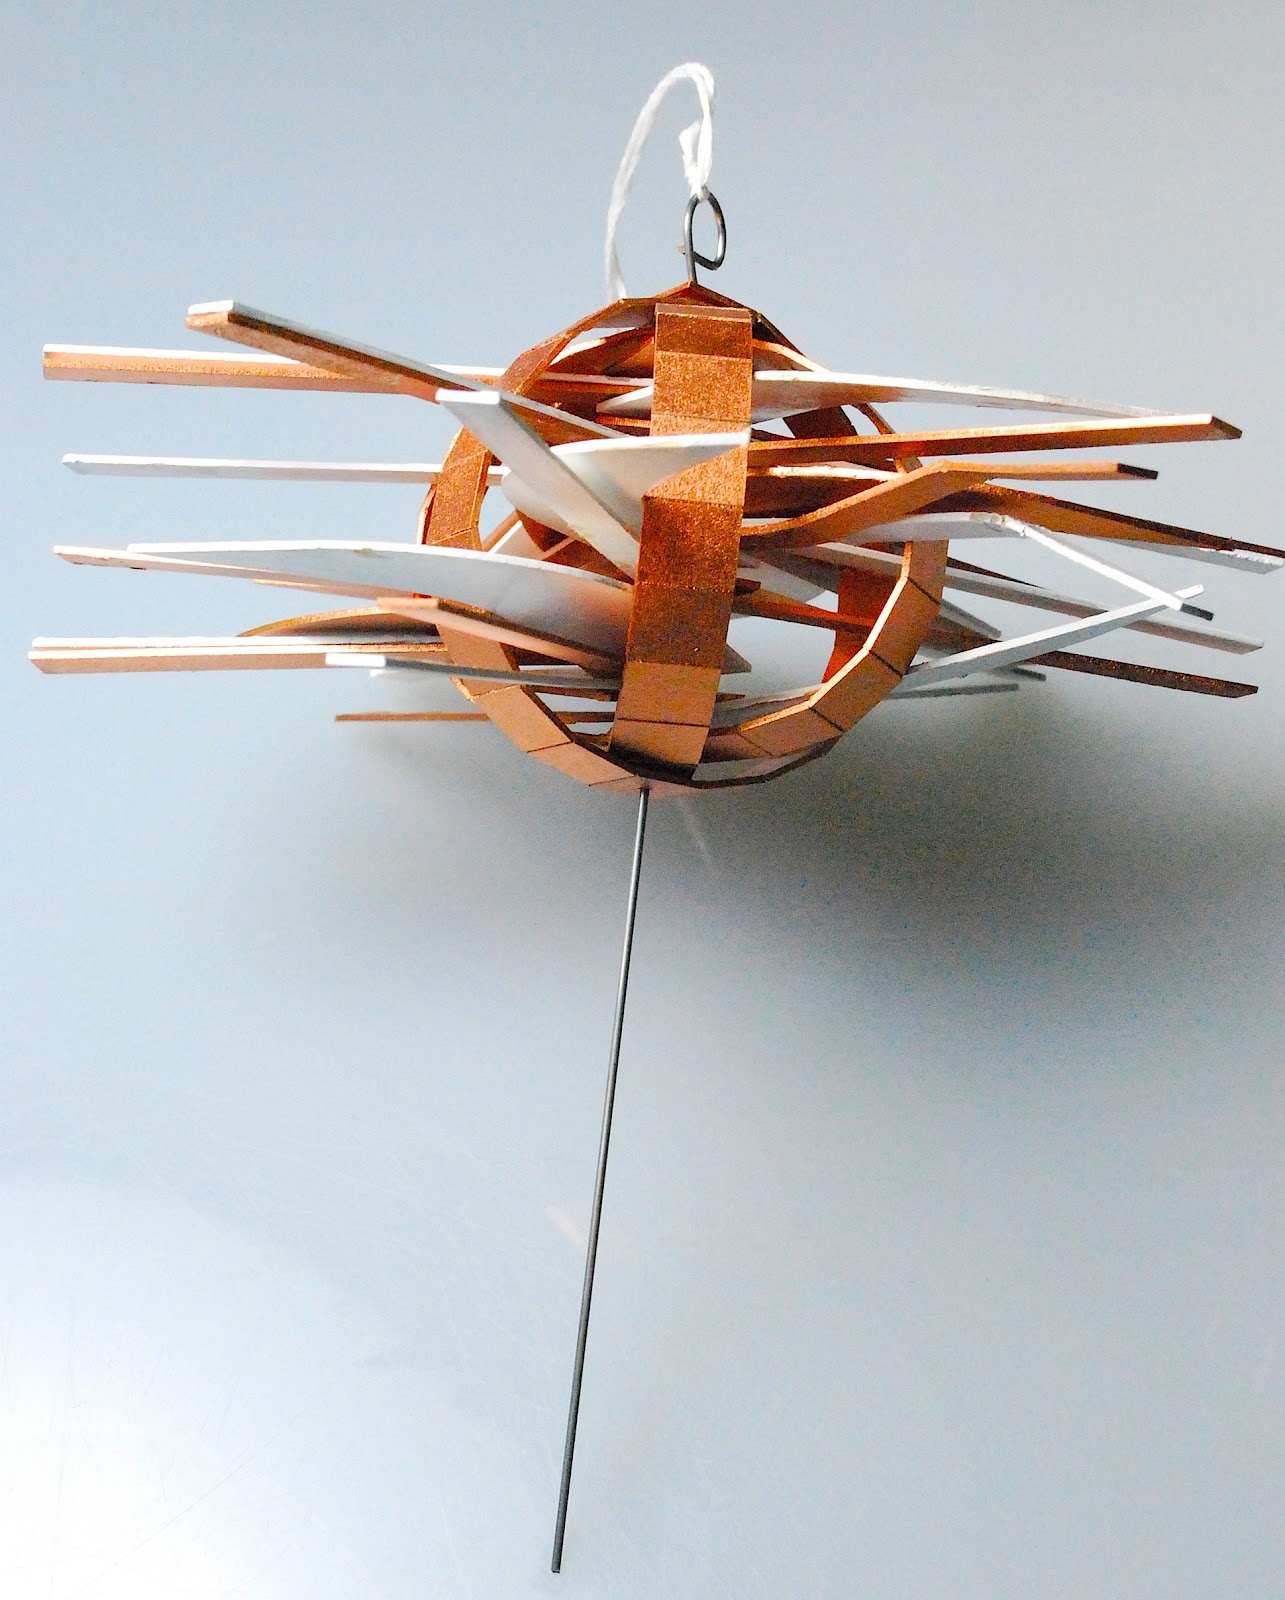
Her are my final photos and final render. In the first four photos I really wanted to emphasis and show the movement that my model creates as well as capturing the detail of the stacking in an interesting composition. I really love these photos that I have taken and I think the different lighting really expresses a powerful message but what my model is and what it stands for

Final Photo One:


Final Photo Two:


Final Photo Three:


Final Photo Four:


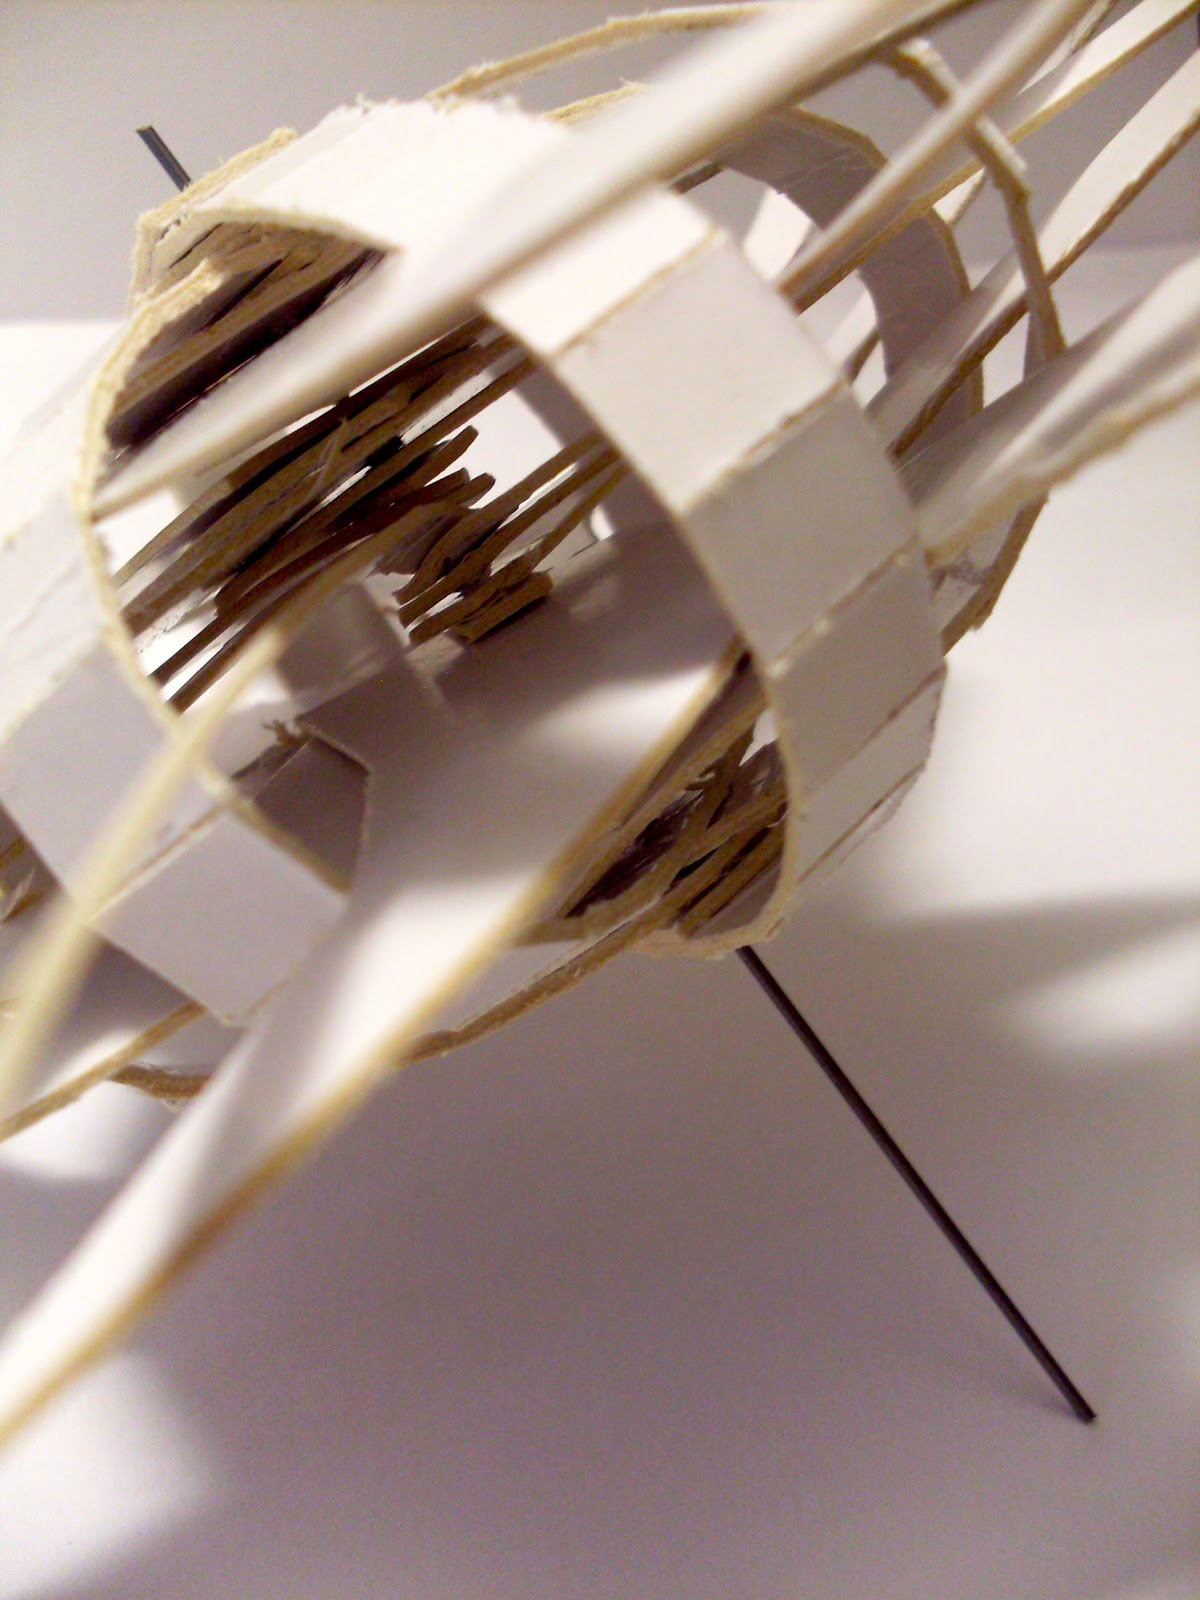
For this final photo and the final re render I really wanted the two to be a series of their own. The other previous four photos are a build up to the narrative that I am trying to tell.  In this photo and re render I really wanted to focus on a particular part of my model. I have chosen to take a close up of the inside of my model with a few lashes coming out of it to create movement. I found that the stacking part of my model was quite interesting when you got up real close to it, hence my decision to do this. When it came to re rendering I thought that doing the same thing to my hero shot would create a new interesting angle and approach to my model. Even though I haven't applied a background and lots of back lighting to my re render I feel that it speaks for itself as is. I did place some lights in the center of my model which I think has worked out really well and I love how the copper coloured metal reflects onto the white coloured metal.

Final Photo Five:


Final Render:


Project Two: Photo Shoot Time


Below are all the photos I took of my final model in the photography studio. I did take a lot. When taking the photos I wanted to focus on capturing my model at different angles and with different lighting. Something else that I really enjoyed exploring was the idea of capturing my model moving. I had a lot of fun spinning my model and catching the movement of the spinning. I really feel that the spinning motion draws the model back to my orignal three words shock, insanity and asymmetrical. 
I have taken a few of these photos into photoshop and boosted the colour, changed the levels and cropped the images to help push my narrative further. Overall I think I managed to get some really awesome photos that helps bring in an complete this project. 


Contact Sheet One: 


Contact Sheet Two:


Contact Sheet Three:


Project Two: Assembly Of Model


Above are a few images from the process of assembling my model. Spray painting to stacking the pieces on the wire. This was pretty easy and didn't take too long to construct which was nice. The spray painting was the tedious part. 


Final Assembly Of Model:


This here is a photo of my final model all assembled. I am pretty happy with the final outcome of it. I am so pleased with the way that the copper coloured spray paint turned out. I think It looks very effective and ties nicely to my rendered model. Even though I didn't have all of my pieces to begin with  because I submitted in the wrong file to be cut, I feel that it has ended up working to my advantage and I didn't even end up needing to use all the pieces that I did have. I used a simple method of stacking to construct this model yet I think I have managed to make it look quite complex and chaotic.


Tuesday, 18 September 2012

Project Two: Re Rending Practice


Below are some practices of re rendering my orignal model from project one. I haven't made too many changes but the changes that I have done I think all help bring together my project as a series. 

In each of the renders I have placed a spot light in the center of my model to light up my model and highlight the inside of it. I really wanted to crop my re render and have tried a number of different compositions that all involved cropping. I wanted to do this so that I could emphasis and show off the inside of my model and the lashes coming out of the center. In the photo of my physical model this is something that I have tried to capture and therefore wanted my render to be similar so that it could look like a series.  I have also added white metal pieces into my model as in my physical model I have used a combination of copper and white spray painted pieces. Overall I really like how that in the renders you can see the reflection of the copper coloured metal on the white coloured metal.

For my final Render I am leaning towards using the image below Re Render Two. I will make a final decision though once I see what it looks like along side my final finished physical model and the photo to see if it looks like a complete series or not.


Practice Re Render One:


Practice Re Render Two:


Practice Re Render Three:


Practice Re Render Four:


Wednesday, 12 September 2012

Project Two: Laser Cutting Result


Laser Cutter Pieces:


Today we got our laser cutting files back and unfortunately I handed in two of the same files so I now am short of a lot of pieces. After talking over with the tutor I have realised that maybe this is a good thing that it happened as I am having to change my model slightly and the changes that I am making support my idea. I will have less layers of staking and the stacking will occur in a slightly different order as well as this the other change is that instead of using 4 strips to construct the sphere I will only use three so that it gives me 6 gaps instead of 8. I am choosing to do this because I only have 12 pieces of one shape so to make it even and enough to get two layers its works out this way. Overall I am not disappointed with what has happened, I am just hoping that the end result still looks just as good as what I had planned.

Monday, 10 September 2012

Project Two: Ai Files


Illustrator Files:

Both of the A4 pages are to be printed in card. I have put etch lines in the wider strips that make the circle to give me a guide of where to score and to make sure that the score lines are straight and accurate.

Project Two: Mock Up Final


This is the final Mock up of my model. My model is going to be made out of card only and a piece of 1mm metal wire. To make this model it involves a lot of stacking. For the final model I am going to make a loop at the top of the model using the wire which I will then put some thread through so that it can be hung. 


Sunday, 2 September 2012

Project Two: More Practice Models


Practice One And Two:


For these practice models I looked at the stacking method and how I could develope this method further to create a model that relates to my hero model from project one. In this first image I developed on the first model that I did for this project. I focused on stacking up basic shapes that I found formed my hero model. I have used a piece of wire through the middle to hold the model together. 

In the second image I really wanted to include the sphere shape some how with pieces coming out of it, so I explored the idea of stacking circles on wire with cuts out and then pulling stripes through the cut outs. I think the method was quite effective but I am not to sure how easy it would be to do in acrylic or thicker card so I want to try and simplify this idea and focus on the detail more. 


Practice Three:


This model is one of the first ones I did. It was just a basic model practicing the method of having strips making up a circle all connected together with wire down the middle and then having shapes stacked up inside of it coming out and poking through the gaps of the circle. I thought that using a process similar to this would show the forms that are created in my hero model. Creating something similar yet different.


Practice Four:


This is one of the orignal models that I made exploring the idea of using cut outs us a process. I really just wanted to practice this method and see what aesthetic it created as well as what it could potentially offer me for further development.


Practice Five:


This model here is combining a few of the methods that I have previously tried. I am looking at this to be my final model. Here I have used the idea of the sphere and stacking inside. I have alternated between using a simple shape and then strips of card to create the stacking effect. Something I still need to consider is the connection and whether I will stay with using wire or use stitching. I am thinking about using card to make the sphere and acrylic to make the shapes that I then stack. I am hoping that I will have enough card to do the whole model in card as well as I am finding it hard to visualise what it would like in both acrylic and card. This way I can make up both and then hand in what looks best. For the next model I am going to try remaking this but in the right thickness of card so that I can then see exactly what I still need to work on.

Monday, 20 August 2012

Project Two: Model Ideas And Sketches


After talking to the tutor I have had a few ideas and now its just going to be making models to see if they will work. I really like the idea of combining different methods of connecting. I would like to really focus on having a 'core' to my model and then having pieces coming out of that. I would quite like my model to be read from all views and angles as well. I am quite excited to see just what I can do and if these ideas work or not. 


Sunday, 19 August 2012

Project Two: Practice Models


Practice One: 


 Here I have used the planes that I made in illustrator and have layered them together to create the model. I have used a piece of wire down the middle which holds all the layers together. This was just an experiment to get better understanding of what we need to be able to do for this project. I found that my illustrator files were quite hard to work with. Even though this looks quite messy I still feel that it has a relationship with my hero model. In the next few practise models that I do I want to explore the idea of having a core again. I quite like the idea of bending my material to create cureves that would potentially form a sphere.


Practice Two:


Here I have tried a different approach to layering and used circles stacked on one another. Each circle I have cut patterns into it which I was then thinking I could use those cuts to pull through other material creating a shock effect and the layered circle would represent the sphere shape and core of my final hero model. I think the patterns need to be bigger and thought out more to work but this was just a little experiment I did. 

Project Two: Practicing Sections

Here is a couple of screen shots that I have taken to show the process of sectioning my hero model from project one. I found that I had to reduce the size of my model quite abit because it was taking a ridiculous amount of sections to cover the model. For my final I really want to consider the position and rotation that I have my model shown in so that I get really nice sections to work with in illustrator. 


3DSMAX Sectioning:


After creating the sections in 3DSMAX I opened them up in illustrator. I found that when I opened them in illustrator the images were just lots of little lines which made it hard to create shapes from. So i used the pen tool and just roughly made some planes which I would then use to make a model.  Below are a couple of images showing this. 


File From 3DSMAX in Illustrator:


 Templates Of Planes In illustrator To Make Practice Model:


Saturday, 18 August 2012

Project Two: Precedents

After doing some research and more sketches and beginning to understand more what is expected of us in this project I have found some precedents which I would like to use as a guide and inspiration. 


Precedent One:


I chose this example because I really like the construction of it and how at first it looks reasonably simple but then if you really look into the model its actually much more complex. I like all of the faces that it is made up of. 


Precedent Two:


This image just really reminds me of what my words were in the first project. Shock, insanity and asymmetrical. I thought that it was quite important to have a precedent that showed aspects of your word since the form we are making comes from our hero model in project one. I would love to make something like this but with different material and a slightly different method. 


Precedent Three:


I have chosen this image as a precedent because it is so simple and beautiful. It isn't overly complicated yet still creates a story. I like the spherical shape and pattern that has been cut out to create the shape. 


Tuesday, 14 August 2012

Project Two: Laser Cutting Inspiration

Just to see what is out there I have had a little bit of a search to find images of some laser cutting designs. Below are just a few that I found that really caught my attention. I really liked the forms that all of them have made. I also really like the layering that some of them show. A simple process made into a complex form. I am not sure if I will use any of these as precedents for my own form but I do think that they share some qualities and relate to some of the iterations I did int he first project.


Generator.x2.0:

Retrieved From http://www.designboom.com/weblog/read.php?CATEGORY_PK=&TOPIC_PK=2629

 Camouflage Light:

Retrieved From http://www.scandinaviandesign.com/zero/camouflage.htm

 Wooden Bulb:

Received From: http://www.suck.uk.com/products/woodenbulb/

Retrieved From Google Images


Project Two: Sketches


Sketches Of  Models From Project One:


After reading over the brief a couple of times and understanding what it is we are doing in this next project I decided to do some sketches of my final hero model from the first project which I hope to make in this project. Since my model is quite complexed I am thinking of breaking my model down even more or using one of the earlier iterations. It also crossed my mind to consider using my orignal solid works model or combining aspects of models together to create a new one. I am still very unsure of what it is that I want to do. I will keep on sketching and researching laser cutting to get an idea of the possibilities. I am really looking forward to this project it sounds quite fun.